
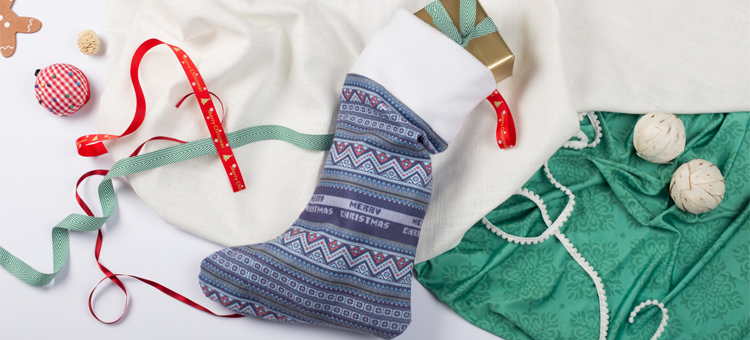
There are so many lovely things associated with Christmas but one of the nicest is the sight of a gorgeous Xmas stocking hung by a fireplace *sentimental sigh*.
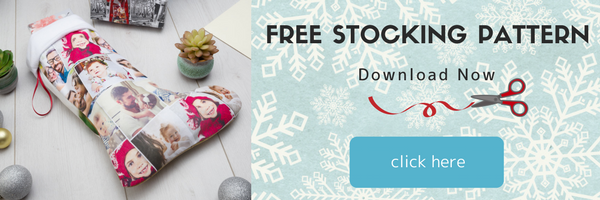
Here’s your free pattern to get you started, and you can see how to make your own Christmas stocking here. Simply click the button below to print out your free pattern!
At Bags of Love, we are all about the sentiment and when it comes to the best stockings, you can be sure that personalised stockings come out on top! Handmade Christmas stockings are lovely, but are even better when they’re designed and made by your own hands.
If you want to know how to make a Christmas stocking, then you are in luck! We have created a little tutorial video, to show you just how to make a Christmas stocking, which will make the perfect gift for just about anyone (with plenty of space to ensure you can still stuff them with other presents!)
Follow our step-by-step guide and see how to make a Christmas stocking, which you can hang proudly year after year.

Making Christmas Stockings; What You Will Need:
Here is what you will need when learning how to make your own Christmas stocking:
- Our DIY Christmas Stocking Pattern
- A pair of sharp fabric scissors
- Domestic sewing machine and thread (you can do this with a hand stitch but we recommend using a sewing machine if possible)
- Chalk
- Pins
- Sticky tape
- A 10cm length of ribbon in your choice of colour
- An A3 size piece of fabric for the cuff
- An A2 size piece of fabric for the sock
Bags of Love – How to Make a Christmas Stocking Tutorial
1. Choose your perfect stocking fabric.
Not sure what fabric is best for you? We have some custom fabric suggestions at the end of the tutorial.
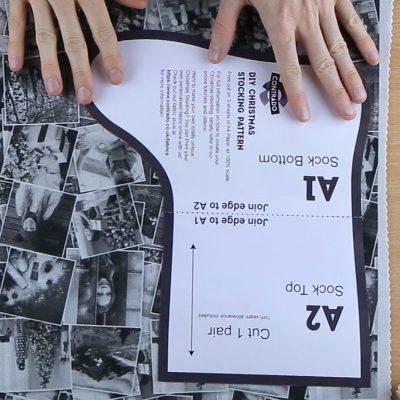
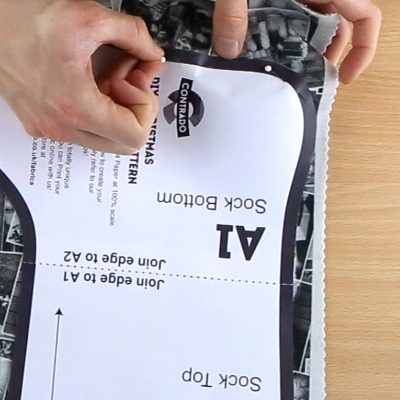
2. Download our Christmas stocking template
Just click here to download our DIY Christmas Stocking Pattern. It will print out on 3 sheets of A4 paper at 100% scale. Cut out the paper pattern and you are ready to start.
3. Join the pieces
Join piece A1 to A2 along the dotted lines with some tape. This will become the sock panel of the stocking. For now, keep piece B separate, as this will be your cuff panel. This piece can be made from the same fabric as the sock or you can choose a completely different fabric.
4. Cut out your fabric
Lay your paper patterns on top of your chosen fabric, using the pattern arrows to align with the fabric grain directions (techy phrase: selvedge edge). Pin them in place lightly and cut around the outside edge of the pattern. You could alternatively draw around the outside of the pattern with chalk, then remove the paper pattern and cut around the marks. Flip your pattern over and do the same for the reverse side of the sock.

5. Let’s pin together
Take your 2 fabric sock panels and pin them together with the right side (the side with your print or design) facing in.
6. Time to stitch
Let’s get that sewing machine out! Stitch your sock together around the heel, toe and sides of the sock, leaving a 1cm seam allowance. It’s very important to leave the top of your sock open (otherwise there will be nowhere for your presents to go!)
7. Cuff it up
Lay the 2 panels of the cuff together with the right sides facing in. Sandwich a loop of ribbon between the 2 cuff panels with the ends of the ribbon sticking out through one of the intended side seams. Make sure you place the ribbon as close to the middle of the seam as possible (where the fold line is) to ensure it ends up at the top of the completed stocking when flipped through.
8. Sewing up the cuff
Sew down the left and right edges of the cuff panels, leaving the top and bottom open.
9. Making it look cuffing pretty
Fold the bottom edge of the cuff up to meet the top edge, with the wrong sides facing it. The ribbon loop should now be showing on the outside, near the folded edge. You’re almost there!
10. Time to introduce the sock to the cuff
Place the cuff inside the sock panels (with the right sides together) so all the raw edges of the cuff and sock are aligned at the top. Ensure that the side of the cuff with the ribbon loop, is on the same side as the heel on the sock.
11. A bit more sewing
Next, sew the raw edges together in a circle, so you can still access the inside of the stocking.
12. And finally…
Turn your stocking inside out, so the right side is now facing out! Press the seams flat – depending on which fabric you choose – and ho, ho, ho, you have your very own personalised Christmas stocking; designed and made by you. If you don’t want to knit a Xmas stocking, then this year, go for customised instead.
Which fabric is for me?
If you need a bit of help choosing which fabric option would work best for you, we have a few suggestions, which we think are perfect for making a Christmas stocking. Half Panama is a lovely choice for a more rustic looking stocking. For something a bit trendy, Vintage Loop Back Jersey is a cool and stylish option. For more traditional and cosy style Christmas stockings, try Polar Fleece, Plush Velvet or Suede Vision. All these fabrics and more can be found in our custom fabric page.
Don’t forget to share photos of your finished stocking!